
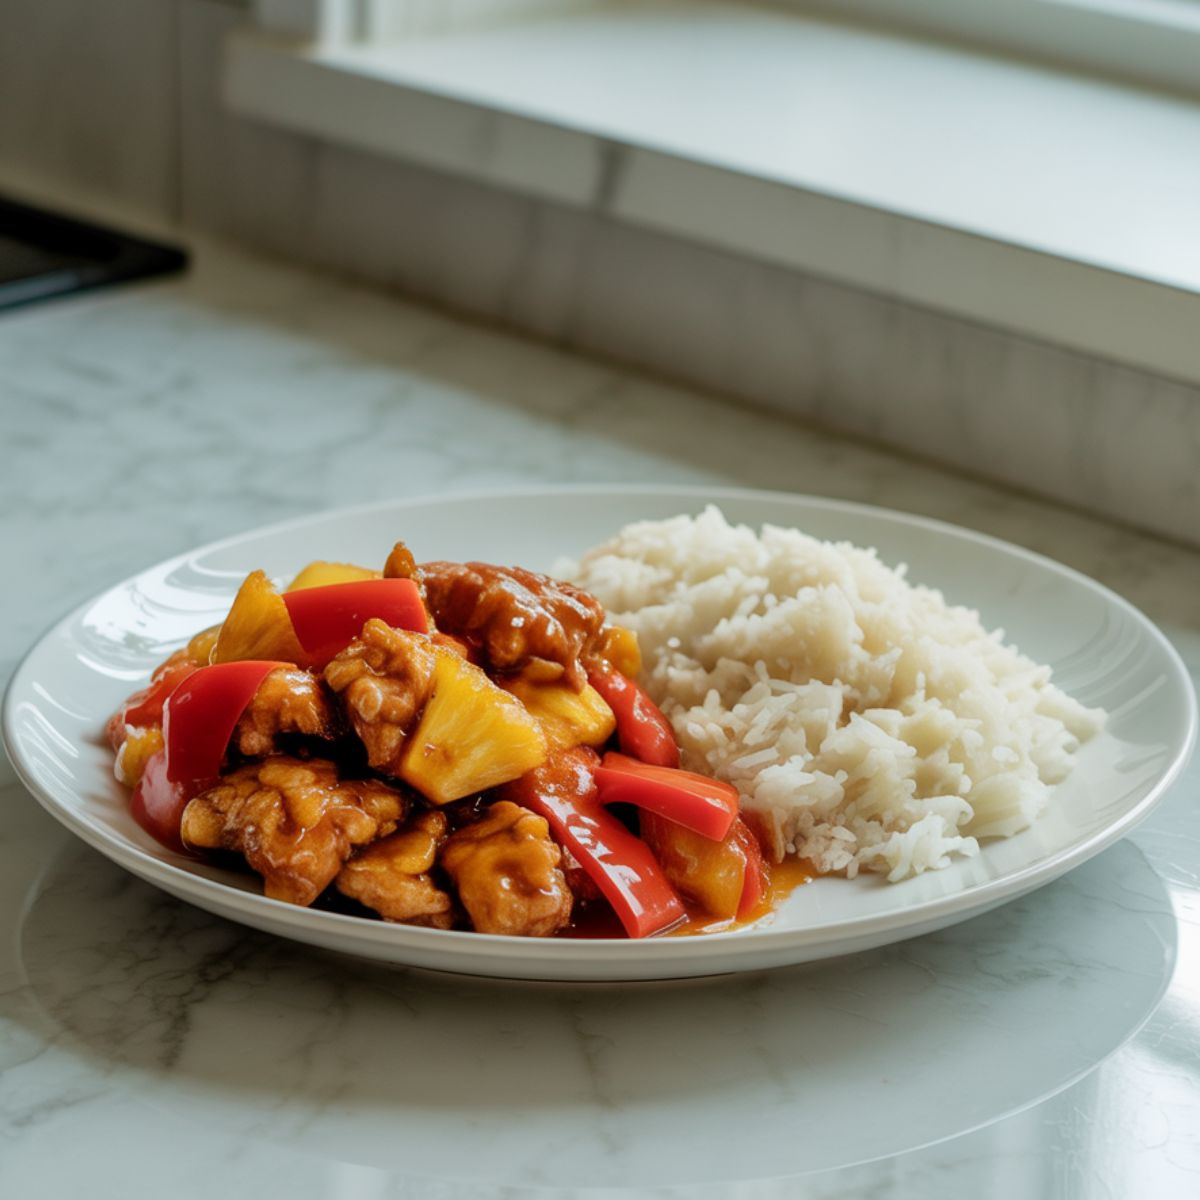
Craving that perfect balance of sweet and tangy flavors but tired of ending up with soggy takeout? Let me share a Sweet and Sour Chicken Recipe that actually hits the mark; it’s crispy, flavorful, and totally satisfying. This Sweet and Sour Chicken Recipe brings those golden, crunchy chicken bites together with a glossy homemade sauce and juicy pineapple chunks—just like your favorite restaurant but made fresher at home. The best part? This Sweet and Sour Chicken Recipe is ready in about 30 minutes; it’s the kind of quick, crowd-pleasing dinner that’s perfect for busy weeknights. Say goodbye to bland takeout; once you try this Sweet and Sour Chicken Recipe, you’ll never go back.
Why You Will Love This Sweet and Sour Chicken Recipe
The Sweet and Sour Chicken Recipe has always been a classic takeout go-to; but this homemade Sweet and Sour Chicken Recipe gives you everything you love—without the guilt. You get full control over the ingredients in this Sweet and Sour Chicken Recipe, from how much sugar goes in to skipping all those artificial additives. The result? A crispy, golden coating and a glossy, sweet-tangy sauce that clings to every bite. This easy Sweet and Sour Chicken Recipe comes together with basic pantry staples and is perfect for busy nights. Serve your Sweet and Sour Chicken Recipe with rice or noodles, and enjoy the way fresh pineapple and bell peppers add a satisfying crunch and natural flavor that puts takeout to shame.
Jump to:
Ingredients
For the Chicken:
- Boneless chicken thighs (cut into bite-sized pieces) - Thighs stay juicier than breasts
- Cornstarch coating - Creates that signature crispy texture
- Eggs (beaten) - Helps the coating stick perfectly
- Salt - Seasons the chicken from the inside out
- Black pepper - Adds subtle warmth
For the Sweet and Sour Sauce:
- Brown sugar - Provides rich sweetness and color
- Rice vinegar - Gives the perfect tangy bite
- Soy sauce - Adds umami depth
- Ketchup glaze - Creates that classic red color
- Cornstarch - Thickens the sauce beautifully
- Garlic (minced) - Essential for authentic flavor
- Fresh ginger (grated) - Adds aromatic warmth
For the Vegetables:
- Onion (cut into wedges) - Balances the sweetness
- Bell pepper (red or green, chunked) - Adds color and crunch
- Fresh pineapple chunks - Natural sweetness and tropical flavor

See recipe card for quantities.
Instructions
Prep and Make Sauce
- Cut your boneless chicken thighs into uniform 1-inch pieces and season with salt and pepper. Chop bell peppers and onion into chunks, keeping pineapple pieces ready.
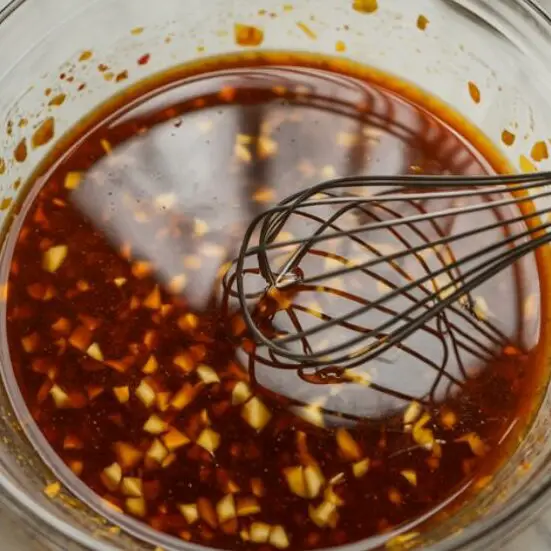
- In a medium bowl, whisk together brown sugar, rice vinegar, soy sauce, ketchup glaze, minced garlic, ginger, and cornstarch until completely smooth. This homemade sauce is the secret to avoiding that artificial taste you get from takeout.
Pro tip: Make sure there are no cornstarch lumps - they won't dissolve once heated and will create an unpleasant texture.
Coat and Fry the Chicken
- Heat oil to 350°F in a large skillet or wok. Dip each piece of seasoned chicken into beaten eggs, then roll in cornstarch coating until completely covered.
- Fry the chicken pieces in batches to avoid overcrowding. Cook for 4-5 minutes until golden brown and crispy. The internal temperature should reach 165°F. Transfer to a paper towel-lined plate.
Expert tip: Don't flip the chicken too early - let it develop that golden crust before turning.
Combine Everything
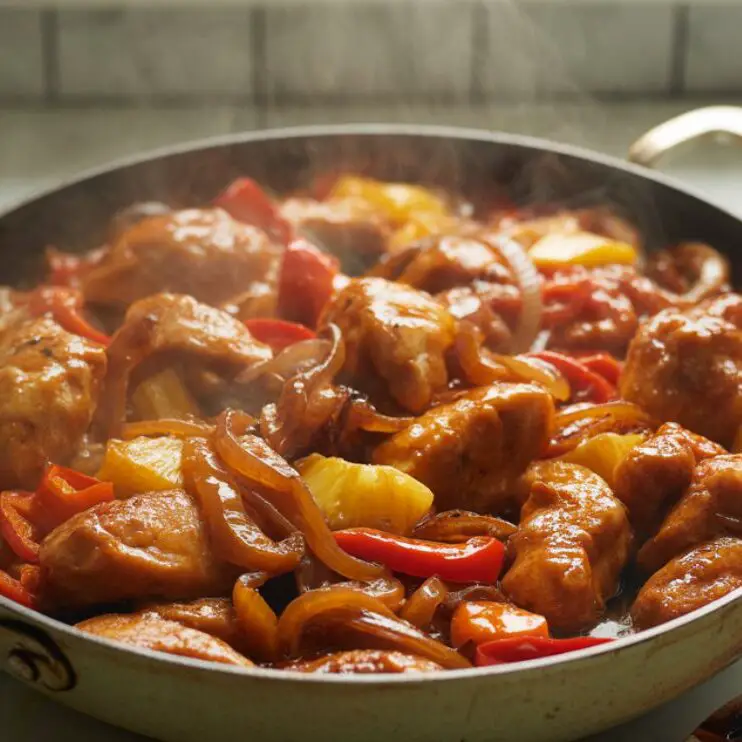
- In the same pan (drain most oil, leaving about 2 tablespoons), add onion wedges and bell pepper chunks. Stir fry for 2-3 minutes until crisp-tender. Add pineapple chunks in the last minute to warm through.
- Return the crispy chicken pieces to the pan. Give your sauce a quick stir, then pour it over everything. Toss gently for 1-2 minutes until the sauce thickens and coats everything
- Step 1: Prep and Make Sauce
Mix the sauce ingredients in a bowl until smooth and lump-free.

- Step 2: Coat and Fry the Chicken
Coat each chicken piece and fry in hot oil until crispy and golden.
- Step 3: Combine Everything
Add veggies, pineapple, sauce, and cooked chicken to the pan and toss to coat.
Expert Cooking Tips and Tricks
- Keep chicken crispy: Don't add the sauce until you're ready to serve. The coating stays crispier longer this way.
- Temperature matters: Use a thermometer for your oil temperature. Too hot burns the coating, too cool makes it soggy.
- Sauce consistency: If your sauce gets too thick, add a tablespoon of water or pineapple juice. Too thin? Mix a teaspoon of cornstarch with cold water and stir it in.
- Make-ahead tip: You can prep all ingredients hours ahead. Just keep the coated chicken in the fridge until ready to fry.
Recipe Variations and Dietary Modifications
Korean Sweet and Sour Chicken Style
- Add 1 tablespoon of gochujang to your sauce for a spicy kick and deeper flavor profile. This creates a Korean-Chinese fusion that's incredibly popular.
Healthier Sweet and Sour Chicken
- Bake the coated chicken at 425°F for 20 minutes instead of frying
- Use coconut sugar instead of brown sugar
- Add more vegetables like snap peas or broccoli
Air Fryer Sweet and Sour Chicken
- Cook the coated chicken pieces in your air fryer at 400°F for 12-15 minutes, shaking the basket halfway through. This method uses less oil while maintaining crispiness.
Gluten-Free Sweet and Sour Option
- Replace regular soy sauce with tamari or coconut aminos. Use potato starch instead of cornstarch for an even crispier coating.
Essential Equipment Recommendations
- Large skillet or wok: A 12-inch skillet gives you room to fry without crowding. Cast iron works great for even heat distribution.
- Kitchen thermometer: Essential for checking both oil temperature and chicken doneness.
- Fine-mesh strainer: Perfect for dusting excess cornstarch off coated chicken pieces.
- Tongs: Better than a spatula for gently turning delicate coated chicken pieces.
Storage and Meal Prep Tips
Refrigerator Storage
- Store leftover sweet and sour chicken in the fridge for up to 3 days. The sauce may thicken when cold - just add a splash of water when reheating.
Freezing Instructions
- You can freeze the cooked dish for up to 2 months, but the texture of the vegetables will change. For best results, freeze just the sauced chicken and add fresh vegetables when reheating.
Meal Prep Strategy
- Cook a double batch and portion it over cooked rice for easy weeknight dinners. Store the rice and chicken separately for better texture.reezing for X days/weeks/months.
The Crispy Secret Behind Grandma’s Sweet and Sour Chicken
When I was a kid, Friday nights meant one thing—Grandma’s sweet and sour chicken. We never ordered takeout; we didn’t have to. Her kitchen always smelled like golden-fried chicken and tangy sauce bubbling on the stove. But she had one quirky secret—she’d let the coated chicken rest for exactly ten minutes before frying. “That’s how the crust hugs the chicken,” she’d whisper, like it was a magic spell.
Years later, I tested that trick in my own kitchen—and sure enough, it worked like a charm. Now, every time I make this Sweet and Sour Chicken Recipe, I remember her crispy secret. It’s not just about flavor; it’s about creating something worth remembering. This dish isn’t just better than takeout—it’s a little piece of homemade tradition.
FAQ
What ingredients are in sweet and sour chicken recipe?
Sweet and sour chicken recipe typically includes bite-sized chicken pieces, cornstarch or flour for coating, bell peppers, pineapple chunks, garlic, and a homemade sweet and sour sauce made with vinegar, sugar, and ketchup or soy sauce.
What are the two ingredients in sweet and sour sauce for chicken?
The base of sweet and sour sauce often comes down to vinegar for the tang and sugar for the sweetness. Other ingredients like ketchup or soy sauce are added for flavor depth.
How to make chicken in sweet and sour sauce?
First, coat and fry chicken until golden and crispy. Then, stir-fry veggies like bell peppers with pineapple; add the sweet and sour sauce, toss in the chicken, and cook everything together until well coated and heated through.
How to make crispy sweet and sour chicken recipe?
Use cornstarch or a cornstarch-flour mix to coat the chicken, then fry it in hot oil until golden and crunchy. Let it rest before tossing in the sauce to keep that crispy bite.
Bring Takeout Flavor Home—The Easy Way
This Sweet and Sour Chicken Recipe proves you don’t need takeout to enjoy bold, restaurant-style flavor at home; it’s crispy, tangy, and made with fresh ingredients your family will actually recognize. This Sweet and Sour Chicken Recipe comes together fast, making it a weeknight winner that still feels special—no extra hassle required. Want to build a delicious dinner rotation? Be sure to check out my Chicken and Mushroom Risotto Recipe for creamy comfort or try the Tender Lamb Breast Recipe if you’re in the mood for something rich and savory. Give this Sweet and Sour Chicken Recipe a go tonight and taste the difference that homemade really makes; and hey, don’t be shy—drop your creation in the comments, I’d love to see it!
Related
Looking for other recipes like this? Try these:

Pairing
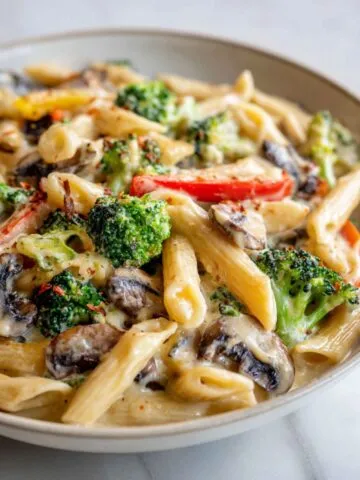
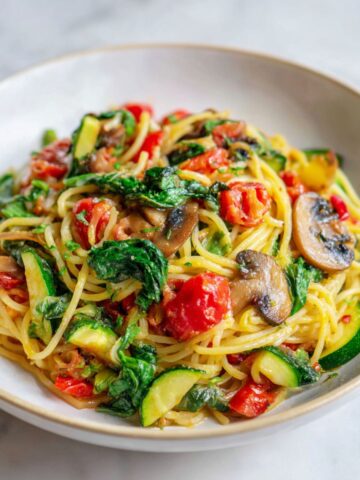
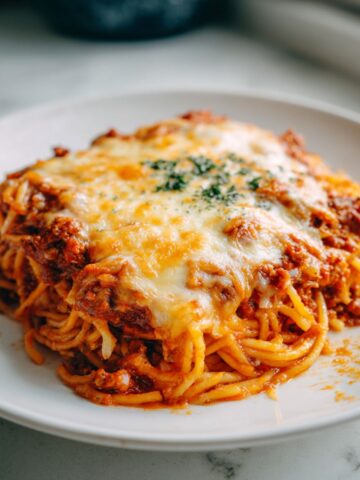
These are my favorite dishes to serve with Sweet and Sour Chicken Recipe


Sweet and Sour Chicken Recipe
Equipment
- 1 Large skillet or wok At least 12-inch wide for even frying
- 1 Kitchen thermometer Essential for checking oil and chicken temperature
- 2 Glass mixing bowls One for sauce; one for chicken prep
- 1 Fine-mesh strainer To shake off excess cornstarch
- 1 Tongs For flipping and tossing chicken
Ingredients
Chicken Coating
- 2 lbs boneless chicken thighs Cut into bite-sized pieces
- 2 large eggs Beaten
- 1 cup cornstarch For coating
- 1 teaspoon salt
- ½ teaspoon black pepper
Sauce
- ½ cup brown sugar Packed
- ⅓ cup rice vinegar
- ¼ cup soy sauce
- ¼ cup ketchup For glaze and color
- 2 tablespoon cornstarch For thickening
- 3 cloves garlic Minced
- 1 tablespoon fresh ginger Grated
Vegetables
- 1 large bell pepper Red or green, chunked
- 1 cup fresh pineapple chunks
- 1 small onion Cut into wedges
Instructions
- Prep all ingredients; cut chicken and vegetables, and mix sauce until smooth
- Coat chicken with egg and cornstarch; fry in hot oil until golden and crispy
- Stir-fry vegetables; return chicken; pour sauce and toss everything to coat
Notes
- Nutrition information is automatically calculated, so should only be used as an approximation.

Leave a Reply