
Are you ready to fall in love with the most irresistible dessert that combines the classic charm of red velvet cake with the smooth, creamy comfort of pudding? This red velvet pudding recipe is about to become your new favorite treat that brings together all the beloved flavors of traditional red velvet in a spoon-friendly format. Whether you're planning a romantic dinner for Valentine's Day or simply craving something special, this red velvet pudding recipe delivers that perfect balance of rich chocolate undertones and tangy cream cheese notes that make red velvet desserts so memorable.
What makes this red velvet pudding recipe truly special is how it captures all the magic of red velvet cake but transforms it into a no-bake dessert that's ready in minutes rather than hours. The vibrant red color, the velvety smooth texture, and that distinctive flavor profile make this red velvet pudding recipe a showstopper that looks as impressive as it tastes.
Why This Red Velvet Pudding Recipe Will Become Your Go-To Dessert
Red velvet has been captivating dessert lovers for generations, and there's something truly magical about transforming this classic cake flavor into a creamy, indulgent pudding. This red velvet pudding recipe takes all the best elements of traditional red velvet ; the subtle chocolate flavor, the gorgeous crimson color, and that signature tangy finish ; and packages them into a dessert that's both elegant and comforting.
Unlike traditional red velvet cake that requires baking time and careful temperature control, this red velvet pudding recipe offers the same beloved flavors in a format that's incredibly forgiving and quick to prepare. The beauty of this red velvet pudding recipe lies in its versatility ; you can serve it in individual glasses for an elegant presentation, layer it with whipped cream for a trifle-style dessert, or simply enjoy it straight from the bowl when you need a quick sweet fix.
Jump to:
Ingredients
Main Pudding Base:
- Instant vanilla pudding mix
- Whole milk (cold)
- Unsweetened cocoa powder
- Vanilla extract
- Red food coloring (gel or liquid)
- White vinegar
- Salt
Cream Cheese Layer:
- Cream cheese (softened)
- Powdered sugar
- Heavy whipping cream
- Vanilla extract
Toppings & Garnish:
- Fresh berries for color contrast
- Whipped cream
- Red velvet cake crumbs (optional)
- White chocolate shavings

See recipe card for quantities.
Instructions
Prepare the Red Velvet Pudding Base
- In a large mixing bowl, whisk together the instant vanilla pudding mix, cocoa powder, and salt until well combined.
- Slowly add the cold milk while whisking continuously to prevent lumps from forming.
- Add vanilla extract and white vinegar, then gradually incorporate the red food coloring until you achieve that signature red velvet color.
- Continue whisking for 2-3 minutes until the mixture thickens to a pudding consistency.
- Cover and refrigerate for at least 15 minutes to allow the red velvet pudding recipe flavors to meld together.
Create the Cream Cheese Layer
- In a separate bowl, beat the softened cream cheese until smooth and fluffy, about 2-3 minutes.
- Gradually add powdered sugar and vanilla extract, beating until fully incorporated.
- In another bowl, whip the heavy cream to stiff peaks.
- Gently fold the whipped cream into the cream cheese mixture to create a light, airy texture.
- Set aside in the refrigerator while you prepare the assembly.
Layer and Assemble
- Choose your serving glasses or dessert bowls for presentation.
- Start with a layer of the red velvet pudding mixture at the bottom of each glass.
- Add a layer of the cream cheese mixture on top of the pudding.
- Repeat the layering process if desired, creating beautiful striped layers.
- Top with a final dollop of whipped cream and any garnishes you prefer.
Chill and Serve
- Serve chilled and enjoy your homemade red velvet pudding recipe creation.
- Cover the assembled desserts with plastic wrap to prevent a skin from forming.
- Refrigerate for at least 2 hours, or preferably overnight, to allow flavors to develop.
- Just before serving, add final garnishes like cake crumbs or chocolate shavings.
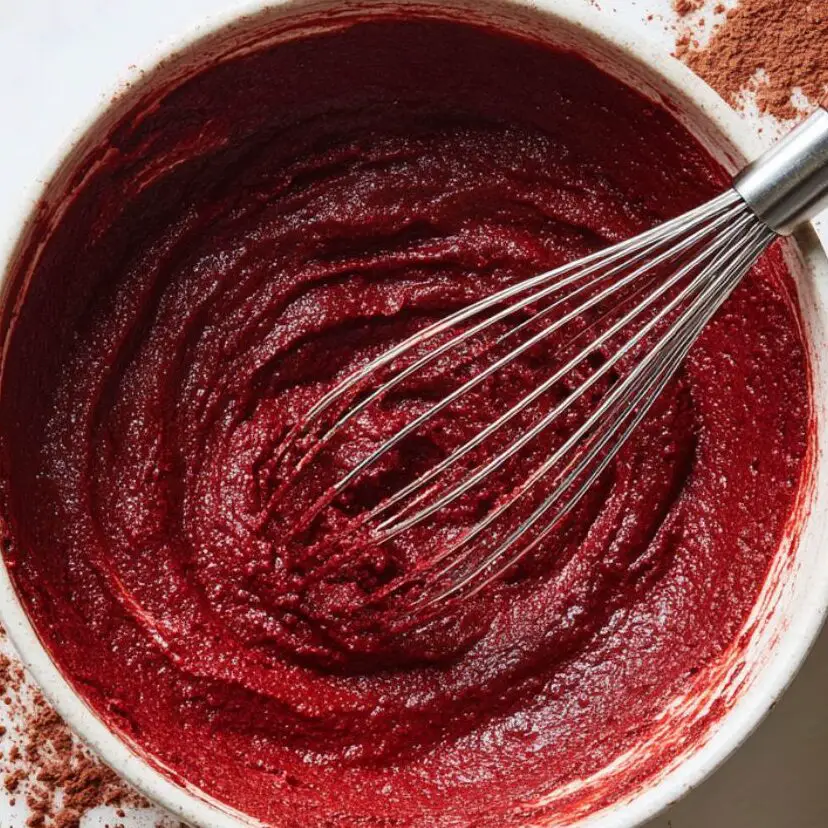
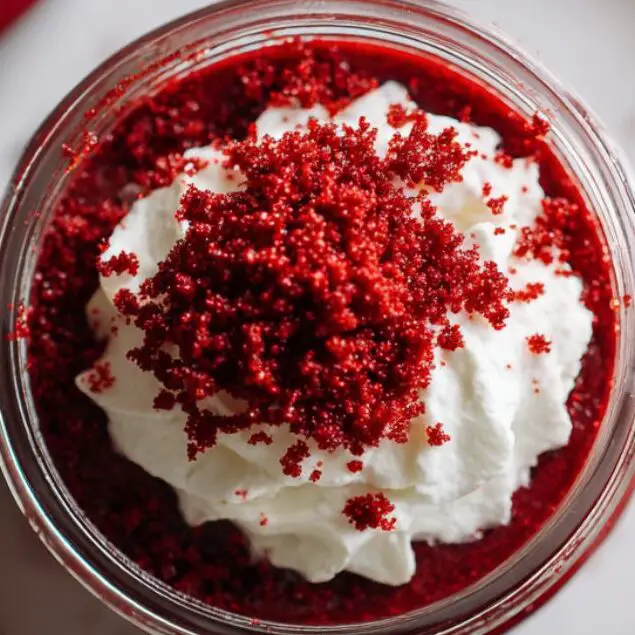
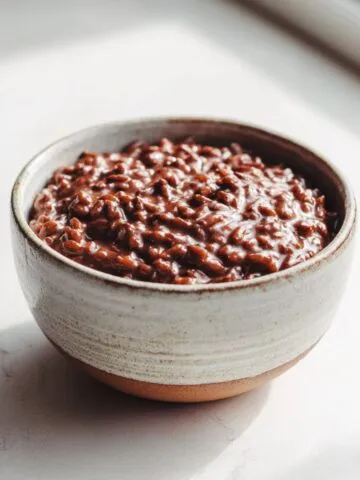
- Step 1: Prepare the Red Velvet Pudding Base
Mix the red velvet pudding base until thick and vibrant in color.
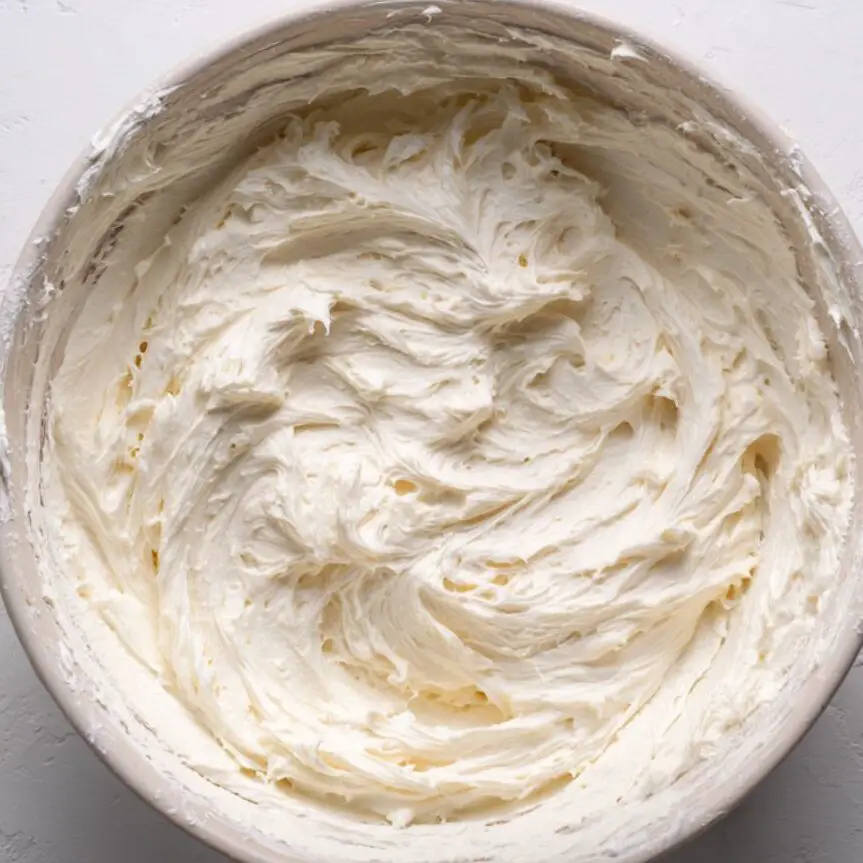
- Step 2: Create the Cream Cheese Layer
Whip cream cheese mixture until smooth and fold in whipped cream.
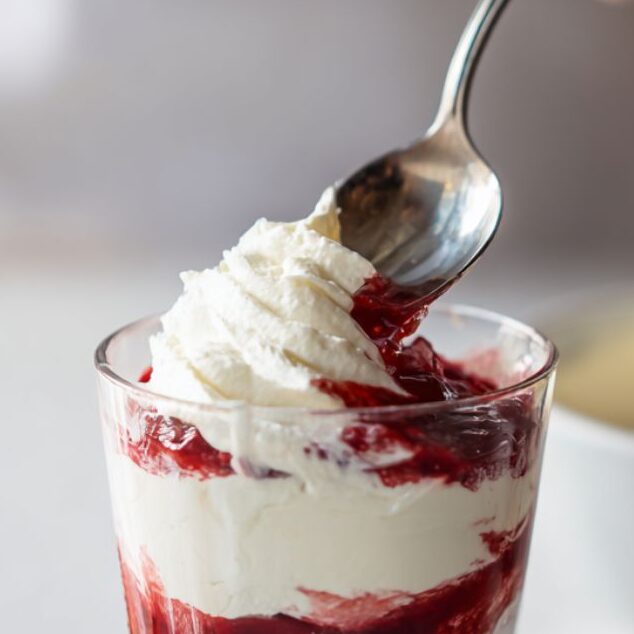
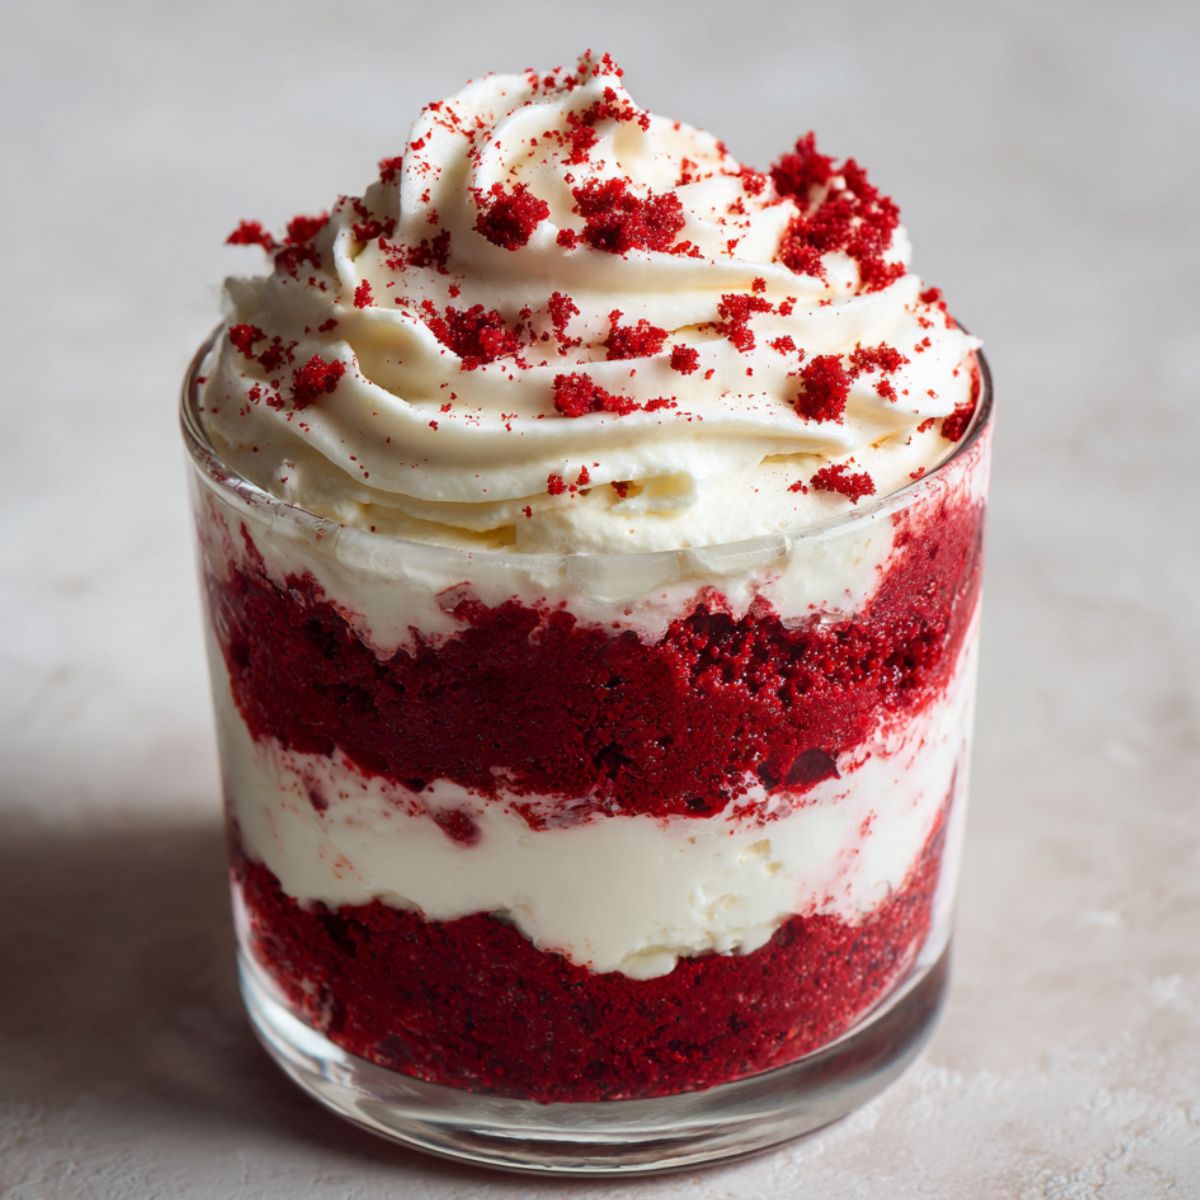
- Step 3: Layer and Assemble
Layer pudding and cream cheese in glass jars for a beautiful look.
- Step 4: Chill and Serve
Chill the pudding for hours and serve with final garnishes.
Expert Cooking Tips
- Temperature Control Always use cold milk when preparing instant pudding to ensure proper thickening and smooth texture. Room temperature milk can result in a grainy consistency that won't set properly.
- Food Coloring Technique Add red food coloring gradually ; gel food coloring provides more vibrant color with less liquid, which helps maintain the pudding's consistency. Start with small amounts and build up to your desired shade.
- Cream Cheese Preparation Ensure your cream cheese is properly softened before mixing. Cold cream cheese will create lumps that are difficult to smooth out, even with vigorous mixing.
- Layering Success Use a piping bag or large spoon to create clean, defined layers. Chill each layer for 10-15 minutes before adding the next one for more distinct separation.
- Flavor Enhancement A small amount of buttermilk powder (1-2 tablespoons) can add that authentic red velvet tanginess if you want to intensify the traditional flavor profile.
Recipe Variations & Substitutions
Dietary Modifications
- Sugar-Free Version Replace regular pudding mix with sugar-free instant vanilla pudding and use sugar-free powdered sweetener instead of powdered sugar. This modification maintains the creamy texture while reducing calories.
- Dairy-Free Alternative Substitute coconut milk for regular milk and use dairy-free cream cheese alternatives. Coconut cream can replace heavy whipping cream for a rich, tropical twist on the classic recipe.
- Gluten-Free Option Most instant pudding mixes are naturally gluten-free, but always check labels. Add gluten-free red velvet cake crumbs for texture without compromising dietary needs.
Flavor Variations
- Blue Velvet Pudding Simply replace red food coloring with blue for a fun color variation that maintains the same delicious flavor profile.
- Chocolate Intensity Add an extra tablespoon of cocoa powder for a more pronounced chocolate flavor, or fold in mini chocolate chips for textural interest.
- Seasonal Twists Incorporate seasonal flavors like peppermint extract during holidays or add fresh strawberry puree for summer gatherings.
Equipment Recommendations
- Essential Tools A good-quality whisk is crucial for smooth pudding preparation and preventing lumps. Electric hand mixers work best for whipping cream and beating cream cheese to the proper consistency.
- Serving Vessels Clear glass dessert cups or mason jars showcase the beautiful layered appearance of this red velvet pudding recipe. Trifle bowls work perfectly for family-style serving.
- Storage Containers Airtight containers are essential for maintaining freshness. Individual portion containers make meal prep easier and portion control more manageable.
Storage & Meal Prep Tips
Refrigerator Storage
- Store your finished red velvet pudding recipe in the refrigerator for up to 4 days. Cover tightly with plastic wrap or store in airtight containers to prevent the pudding from absorbing other flavors.
Freezing Instructions
- While not recommended for the layered version, the base pudding can be frozen for up to 1 month. Thaw overnight in the refrigerator and re-whip before serving.
Make-Ahead Tips
- This dessert actually improves with time as flavors meld together. Prepare up to 2 days ahead for parties, adding fresh garnishes just before serving.arnishes like cake crumbs or chocolate shavings.
Grandma's Secret That Changed Everything
Here's the game-changing secret that transforms an ordinary red velvet pudding recipe into something extraordinary: adding a tablespoon of white vinegar to the pudding mixture. This might sound unusual, but the acid reacts with the cocoa powder to create that authentic red velvet flavor that distinguishes it from regular chocolate desserts. The vinegar provides the subtle tang that makes red velvet desserts so memorable and unique.
The second secret lies in the resting time. Many people rush to serve their red velvet pudding recipe immediately, but patience pays off. Allowing the dessert to chill overnight lets the flavors marry together, creating a more complex and satisfying taste experience. The cream cheese layer also firms up beautifully, creating the perfect textural contrast against the smooth pudding base.
FAQ
How to make velvet pudding?
Making velvet pudding involves combining instant pudding mix with cocoa powder, milk, and food coloring, then layering with cream cheese mixture. The key is achieving the right consistency and that signature red velvet pudding recipe flavor through proper ingredient ratios.
What is red velvet pudding?
Red velvet pudding is a creamy dessert that captures the classic red velvet cake flavors in pudding form. It features subtle chocolate notes, tangy cream cheese elements, and that distinctive red color that makes red velvet desserts so appealing.
Is red velvet just chocolate and vanilla mixed?
No, red velvet is more complex than just chocolate and vanilla. A proper red velvet pudding recipe includes cocoa powder for mild chocolate flavor, but also requires acidic ingredients like vinegar to create the unique taste profile that sets it apart from regular chocolate desserts.
What makes a red velvet dessert?
A true red velvet dessert combines mild chocolate flavor from cocoa powder, tangy elements from ingredients like vinegar or buttermilk, cream cheese components, and that signature red color. The balance of these elements creates the distinctive red velvet experience.
Sweet Endings: More Delicious Dessert Adventures
After mastering this incredible red velvet pudding recipe, why not continue your dessert journey with two more show-stopping treats? The Passionfruit Cheesecake Recipe offers a tropical twist with its bright, tangy flavor that perfectly complements creamy cheesecake texture. It's an ideal follow-up for those who love the cream cheese elements in red velvet desserts.
For those seeking a fun, colorful option, the Funfetti Cake Bars Recipe brings childhood joy to adult palates with its rainbow sprinkles and celebratory spirit. These bars share the same approachable, crowd-pleasing appeal as this red velvet pudding recipe, making them perfect additions to your dessert repertoire. Both recipes offer the same satisfaction and impressive results that make this red velvet pudding recipe such a winner.
With sweetness & sprinkles,
By Lisa Johnson 💕
Related
Looking for other recipes like this? Try these:
Pairing
These are my favorite dishes to serve with Red Velvet Pudding Recipe


Red Velvet Pudding Recipe
Equipment
- 2 Mixing bowls One for pudding base, one for cream cheese layer
- 1 Whisk For blending pudding ingredients smoothly
- 1 Hand mixer For whipping cream cheese and whipping cream
- 1 Spatula For gently folding whipped cream into the cream cheese mixture
- 6 Glass dessert cups or jars For individual servings and showing off the layered dessert visually
Ingredients
Pudding Base
- 1 box instant vanilla pudding mix 3.4 oz size
- 2 cups whole milk cold
- 1 tablespoon unsweetened cocoa powder
- 1 teaspoon vanilla extract
- 1–2 teaspoon red food coloring gel or liquid
- 1 tablespoon white vinegar for signature tang
- ¼ teaspoon salt
Cream Cheese Layer
- 8 oz cream cheese softened
- ½ cup powdered sugar
- 1 cup heavy whipping cream cold
- 1 teaspoon vanilla extract
Garnish
- 1 cup whipped cream for topping
- ½ cup red velvet cake crumbs optional
- white chocolate shavings optional
- fresh berries optional, color contrast
Instructions
- Prepare the Red Velvet Pudding Base:
Whisk pudding mix, cocoa, and salt. Add milk, extract, vinegar, food coloring. Mix until thick, refrigerate 15 mins. - Make the Cream Cheese Layer:
Beat softened cream cheese. Add sugar and vanilla. Whip cream separately, fold it in gently. - Layer & Assemble:
Layer pudding and cream cheese in jars. Repeat layers if desired. Top with whipped cream. - Chill & Serve:
Cover and chill for 2+ hours or overnight. Garnish before serving.
Notes
- Nutrition information is automatically calculated, so should only be used as an approximation.

Leave a Reply