
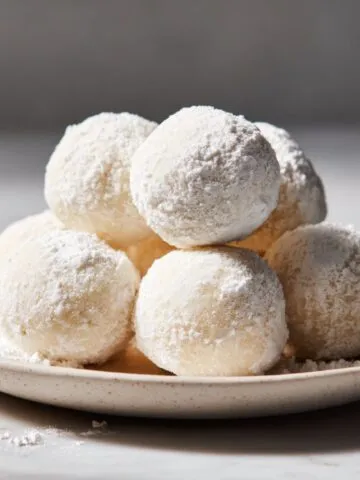
Hey there, dessert lovers! Let me introduce you to something that'll change your party game forever; chocolate covered cheesecake bites recipe that actually tastes like you spent hours in the kitchen (but you didn't, promise!). These little gems combine the best of both worlds; rich, creamy cheesecake wrapped in a smooth chocolate shell that practically melts in your mouth. Whether you're hosting a fancy dinner, need a quick party dessert, or just want something special for yourself, this chocolate covered cheesecake bites recipe is your new best friend. No baking required, no complicated steps, just pure chocolate-cheesecake magic.
What makes this chocolate covered cheesecake bites recipe so incredible? These bite-sized cheesecakes deliver all that decadent flavor without any of the fuss. You get that perfectly creamy filling, the satisfying snap of chocolate, and that "I can't believe this is homemade" reaction from everyone who tries them. Plus, your chocolate covered cheesecake bites recipe can be made days ahead, frozen, and ready whenever you need an impressive dessert. That's the kind of easy win we're talking about here.

Why This Frozen Cheesecake Bites Recipe Stands Out
If you've ever thought mini cheesecake balls seemed too complicated, think again. This no-bake chocolate cheesecake bites approach skips the stress and delivers restaurant-quality results straight from your kitchen. The beauty of making cheesecake truffles this way is that every single bite tastes exactly like a tiny slice of the world's best cheesecake, dipped in dark chocolate heaven. Unlike traditional baked cheesecakes that need cooling, refrigerating, and careful slicing, these frozen cheesecake bites let you work at your own pace. Mix, roll, dip, and you're basically done.
The magic happens when you freeze these chocolate dipped cheesecake bites before dipping them in chocolate. This step is what separates good ones from absolutely incredible ones. When you freeze your mini chocolate cheesecake balls, they hold their shape perfectly while that silky chocolate coating sets up around them. These creamy cheesecake bites are perfect for Valentine's Day, Christmas parties, baby showers, or literally any time you want people to think you're a dessert genius. The best part? They're easier to make than cookies and taste way more fancy.
Jump to:
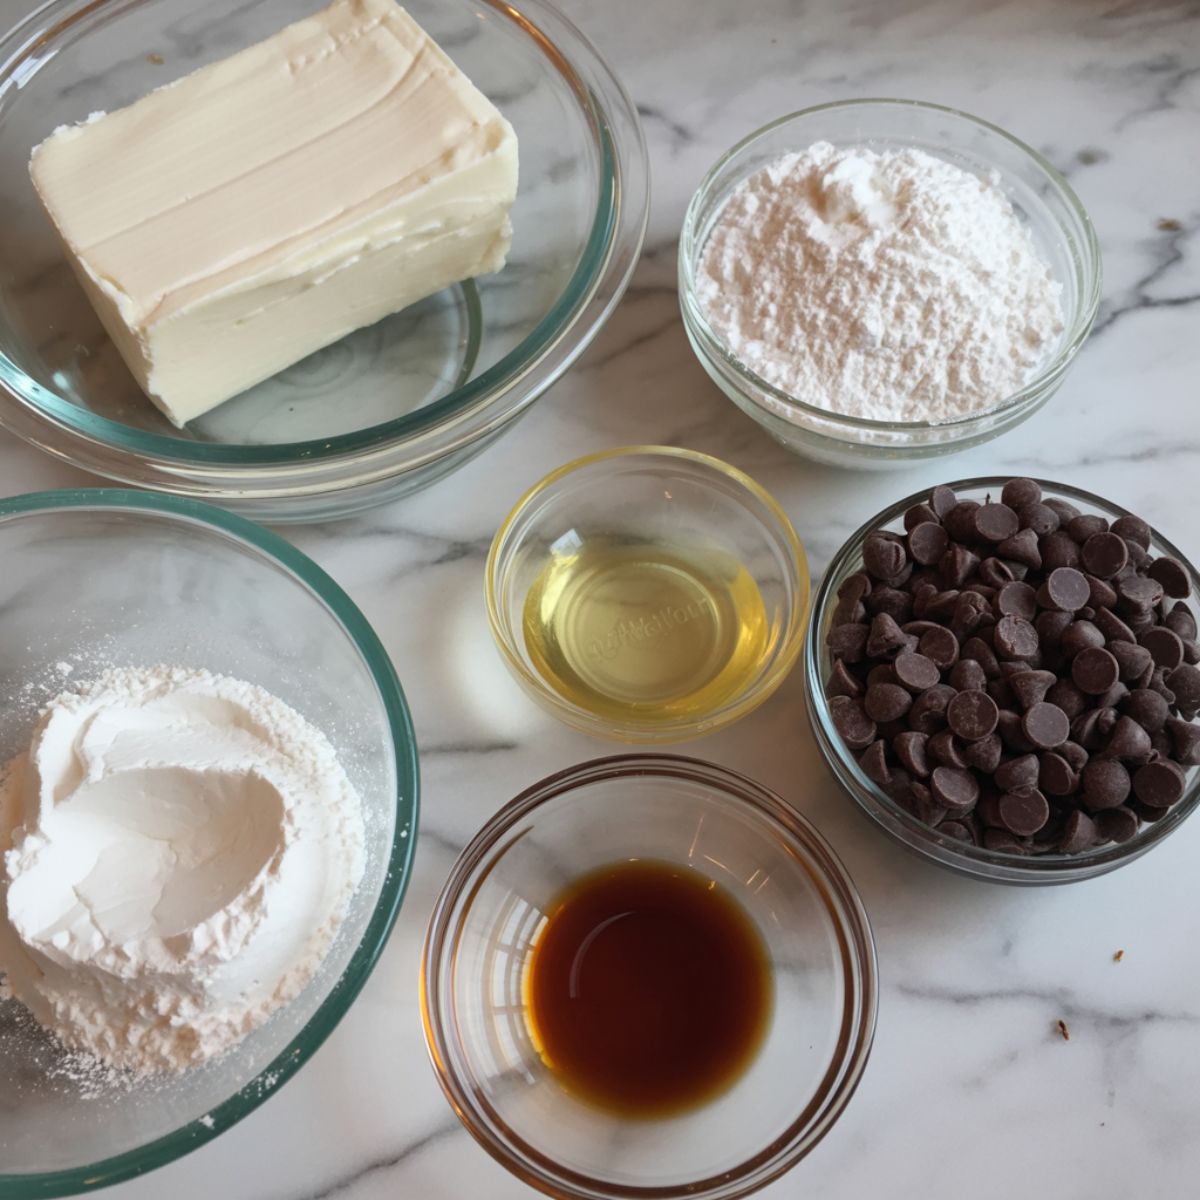
Ingredients
Core Cheesecake Filling
- Cream cheese, softened to room temperature
- Powdered sugar, sifted smooth
- Heavy cream or sour cream, for extra richness
- Vanilla extract, pure and real
- Sea salt, to balance the sweetness
For the Chocolate Coating
- Optional toppings: sprinkles, crushed cookies, or cocoa powder
- Semi-sweet chocolate chips or high-quality chocolate
- Coconut oil or vegetable shortening, helps the chocolate glide smooth
See recipe card for quantities.
Instructions
Setting Up Your Cheesecake Base
Take your cream cheese out of the fridge about 30 minutes before you start; soft cream cheese is your secret weapon for a perfectly smooth filling.
Add the softened cream cheese into a mixing bowl and beat it with an electric mixer for about 1-2 minutes until it's fluffy and cloud-like.
Gradually add your sifted powdered sugar while mixing on low speed; this prevents lumps and keeps your mixture silky.
Pour in the heavy cream and vanilla extract; continue beating until you reach a thick, spreadable consistency that holds its shape.
Add a tiny pinch of sea salt; it sounds small, but it makes a huge difference in bringing out the chocolate flavor later.
Rolling Your Mini Chocolate Cheesecake Balls
- Scoop the filling using a small cookie scoop or melon baller; aim for roughly walnut-sized portions so they're easy to handle and eat.
- Drop each scoop onto a parchment-lined baking sheet; don't worry if they're not perfect; they'll look amazing once they're frozen.
- Use your hands (slightly damp helps!) to gently roll each portion into smooth, even balls; this usually takes 2-3 minutes total.
- Chill your baking sheet in the freezer for at least 2 hours; this is non-negotiable if you want your chocolate covered cheesecake bites to hold up during dipping.
Melting and Dipping Your Chocolate
- Place your chocolate chips in a microwave-safe bowl with the coconut oil; the oil ensures the chocolate flows like silk without being too thick.
- Microwave in 30-second bursts, stirring between each one, until completely smooth and glossy; avoid overheating or the chocolate becomes grainy.
- Using a fork or dipping tool, carefully lower each frozen cheesecake ball into the melted chocolate; let the excess drip off before transferring to a clean parchment sheet.
- Place dipped bites back into the freezer for 30 minutes; this sets that gorgeous chocolate shell and keeps everything perfectly chilled.
Finishing Touches and Storage
- Once the chocolate has set, you can add sprinkles or other toppings if you're feeling fancy; just press them on before the chocolate hardens completely.
- These frozen cheesecake bites can go straight into an airtight container; they're basically ready whenever you need them.
Expert Cooking Tips
Texture and Temperature Secrets
- Keep your chocolate covered cheesecake bites recipe as cold as possible before dipping; this prevents them from falling apart in the warm chocolate. Never skip the freezing step; it's what separates these from a melted mess.
- Use an instant-read thermometer to check that your melted chocolate is around 88-90°F; not too hot, not too cold.
- For an extra-creamy texture, add an extra tablespoon of heavy cream to your filling; you want it thick but still soft enough to roll.
Chocolate Work Like a Pro
- Double-dipping creates a thicker, more protective chocolate shell; dip once, freeze 15 minutes, dip again for that restaurant-quality finish.
- Add a touch of cocoa butter to your chocolate if you want it to be extra glossy and professional-looking.
- If your chocolate gets too thick while dipping, gently reheat it for 10 seconds in the microwave.
Common Mistakes to Avoid
- Don't use cold cream cheese straight from the fridge; it'll be lumpy and hard to work with.
- Avoid over-mixing your filling; you only need to mix until smooth, not for minutes on end.
- Never dip frozen cheesecake bites into room-temperature chocolate; the temperature shock will cause them to sweat and get watery.
Recipe Variations and Substitutions
Dark Chocolate Cheesecake Bites and Beyond
- Want to switch things up? The beauty of this recipe is that it's incredibly flexible. Make dark chocolate cheesecake bites by simply using dark chocolate chips instead of semi-sweet; they'll have that sophisticated, slightly bitter flavor that pairs perfectly with the creamy filling. For something fun, try milk chocolate cheesecake bites for a sweeter, gentler chocolate experience that kids and chocolate-lovers absolutely adore.
Creative Mix-Ins and Toppings
- Oreo cheesecake bites are a total game-changer; just crush some Oreos and fold them right into your cream cheese mixture before scooping and freezing. You can also make strawberry cheesecake bites by adding strawberry puree or fresh strawberry pieces to your filling. For a holiday twist, add crushed candy canes to white chocolate cheesecake bites, or try caramel chocolate cheesecake bites by drizzling salted caramel into each ball before the first freeze. The possibilities honestly feel endless.
Coating Variations That Wow
- Swap your chocolate coating entirely; use white chocolate covered cheesecake bites for a vanilla-forward dessert, or go bold with dark chocolate covered cheesecake bites for serious chocolate lovers. You can also dip halfway and leave the other half bare for a really modern, chic look. Some people like to roll their freshly-dipped bites in toasted nuts, sprinkles, or crushed cookies for added crunch and visual appeal.
Equipment Recommendations
- A stand mixer or electric hand mixer makes the filling incredibly easy and fluffy.
- Small cookie scoop or melon baller for consistently-sized balls; they'll cook and look more professional.
- Dipping fork or chocolate fork prevents your bites from falling apart during the chocolate bath.
- Parchment paper or silicone baking mats for easy storage and zero sticking.
- Microwave-safe bowl with deep sides to make dipping easier and less messy.
- Instant-read thermometer to get your chocolate at the perfect temperature for this chocolate covered cheesecake bites recipe.
- Airtight container for storing; keeps everything fresh and prevents freezer burn.
Storage and Meal Prep Tips
Fridge Storage
- Your chocolate covered cheesecake bites will stay fresh in the refrigerator for up to 5 days; keep them in an airtight container on a shelf away from strong-smelling foods. They'll stay perfectly creamy and delicious, and actually taste better when they've had a day or two to set.
Freezer Storage
- This is where these little treats truly shine; they'll last up to 3 weeks in your freezer when stored properly in an airtight container. The chocolate coating acts as a protective barrier, keeping the filling fresh and creamy. For the longest shelf life, wrap each bite individually in parchment before placing in the container.
Thawing and Serving
- When you're ready to serve, simply pull them out 10-15 minutes before your guests arrive; they taste best slightly chilled but not rock-hard frozen. You can also serve them straight from the freezer for that extra-cold texture, though they'll take a minute or two to get to optimal eating temperature.
The Chef's Secret That Changes Everything
Here's what separates good chocolate covered cheesecake bites from absolutely mind-blowing ones; add a tiny splash of cream liqueur like Bailey's Irish Cream to your filling. Just a tablespoon transforms everything, giving you that sophisticated, almost professional bakery taste that makes people ask "where did you buy these?" The alcohol cooks off, but the flavor magic stays.
Another game-changer? Tempering your chocolate properly before dipping means a snappier shell and a more professional finish. It sounds complicated, but you're basically just melting chocolate slowly and carefully, keeping it at the perfect temperature. Your chocolate covered cheesecake bites will have that beautiful shine and snap that makes people think you actually went to culinary school.
FAQ
How long can cheesecake bites stay out?
Your chocolate covered cheesecake bites recipe can safely sit at room temperature for about 2 hours max. After that, the creamy filling starts getting soft and the whole thing gets a little messy. If you're serving at a party, keep them on ice or in a cooler until it's time to eat.
How long do cheesecake bites need to thaw?
If you're pulling them straight from the freezer, give them about 10-15 minutes to thaw slightly at room temperature. For the best texture with your chocolate covered cheesecake bites recipe, this short thaw time keeps them perfectly creamy but still holds their shape nicely.
How do you know if cheesecake bites are done?
Your chocolate covered cheesecake bites recipe is done when they're fully frozen solid and the chocolate shell feels completely set. Give one a gentle squeeze; if it feels hard and doesn't have any soft spots, you're good to go. Usually 30 minutes in the freezer after dipping is plenty.
Does chocolate cheesecake need to be refrigerated?
Absolutely, yes. Your chocolate covered cheesecake bites recipe should always be stored in the fridge or freezer. The cream cheese filling needs to stay cold to maintain that perfect creamy texture and prevent any food safety issues. Never leave them out at room temperature for extended periods.
Next Steps; Try These Amazing Desserts Too
If you absolutely loved making these chocolate covered cheesecake bites, you're going to flip for Fudgy Black Forest Bars Recipe; they've got that same decadent chocolate-and-cherry combo that'll have everyone asking for the recipe. You should also definitely try Churro Bars Recipe for a completely different dessert experience that's just as easy and impressive. Both of these treats pair perfectly with your chocolate covered cheesecake bites recipe for an entire dessert spread that looks like you spent your whole day cooking. Mix and match these recipes to create a dessert table that'll make you the star of any event.
With love and sweet bites
Lisa Johnson 🍰💕
Related
Looking for other recipes like this? Try these:

Pairing
These are my favorite dishes to serve with Chocolate Covered Cheesecake Bites Recipe


Chocolate Covered Cheesecake Bites Recipe
Equipment
- 1 Electric hand mixer or stand mixer For smooth cheesecake filling
- 1 Mixing bowl To blend the cheesecake base
- 1 Small cookie scoop or melon baller For even-sized cheesecake bites
- 1 Baking sheet For freezing the cheesecake balls
- 1 Parchment paper or silicone mat Prevents sticking during freezing
- 1 Microwave-safe bowl To melt the chocolate
- 1 Dipping fork or regular fork For dipping the bites in melted chocolate
- 1 Airtight container For storing finished bites in fridge/freezer
- 1 Instant-read thermometer To check melted chocolate temperature
Ingredients
Cheesecake Filling
- 16 oz cream cheese softened to room temperature
- ½ cup powdered sugar sifted smooth
- ½ cup heavy cream or sour cream adds creaminess
- 1 teaspoon vanilla extract pure vanilla for best flavor
- ¼ teaspoon sea salt balances sweetness
Chocolate Coating
- 1 cup semi-sweet chocolate chips for coating
- 2 tablespoon coconut oil or vegetable shortening makes the chocolate smooth
- optional toppings sprinkles, crushed cookies, cocoa powder
Instructions
- Beat softened cream cheese until fluffy.
- Add powdered sugar and blend until smooth.
- Pour in cream and vanilla; mix to thick consistency.
- Add salt; mix gently.
- Scoop and roll cheesecake filling into balls.
- Freeze balls for at least 2 hours.
- Melt chocolate chips with coconut oil in microwave.
- Dip frozen cheesecake balls in melted chocolate.
- Return to freezer for 30 minutes to set.
- Decorate with toppings and store chilled.
Notes
- Nutrition information is automatically calculated, so should only be used as an approximation.

Leave a Reply