
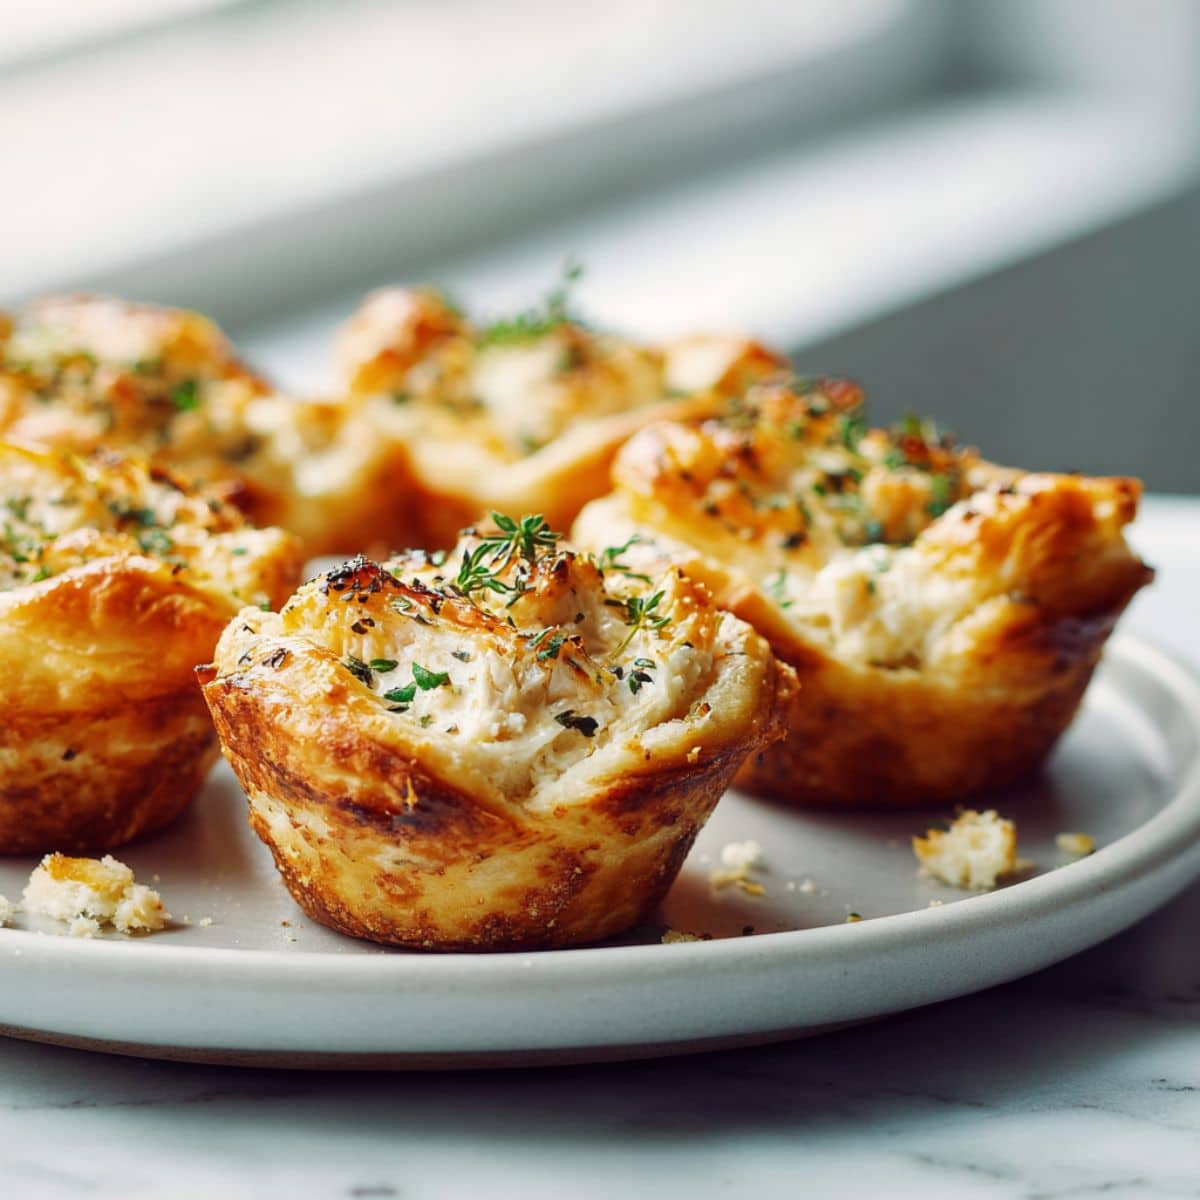
There's something magical about bite-sized food that makes everyone reach for seconds. That's exactly what happens every time I serve this Chicken Cups Recipe at family gatherings. These little golden bundles pack tender chicken, melty cheese, and creamy goodness into one perfect mouthful. Whether you're hosting game day, need a quick weeknight dinner, or want an impressive appetizer that doesn't require chef-level skills, this Chicken Cups Recipe delivers every single time.
I stumbled upon this recipe during a particularly hectic week when I had leftover rotisserie chicken and needed something fast. Now it's become our go-to for everything from after-school snacks to potluck contributions. The best part? You probably have most ingredients sitting in your kitchen right now, and they'll be ready in about 30 minutes from start to finish.
Why These Mini Chicken Cups Are a Total Game-Changer
Let's talk about why this Chicken Cups Recipe has earned its permanent spot in my weekly meal rotation. First, versatility is king here. You can customize these little gems with whatever you have on hand; leftover rotisserie chicken, shredded chicken breast, even that chicken you meal-prepped on Sunday. The base recipe is forgiving and welcomes creativity. I've made them with buffalo sauce for spice lovers, added bacon for extra richness, and even thrown in broccoli when I'm feeling virtuous.
Second, these chicken cups solve the eternal "what's for dinner" dilemma without breaking a sweat. Unlike complicated recipes that chain you to the stove, this one uses simple ingredients and a muffin tin to create something that looks impressive but requires minimal effort. They're perfect for busy parents, college students learning to cook, or anyone who wants homemade food without the stress. Plus, kids absolutely love them, which means you might actually get through dinner without negotiation tactics. The golden, flaky exterior gives way to a warm, creamy center that hits all the comfort food notes while still being practical enough for Tuesday night.
Jump to:
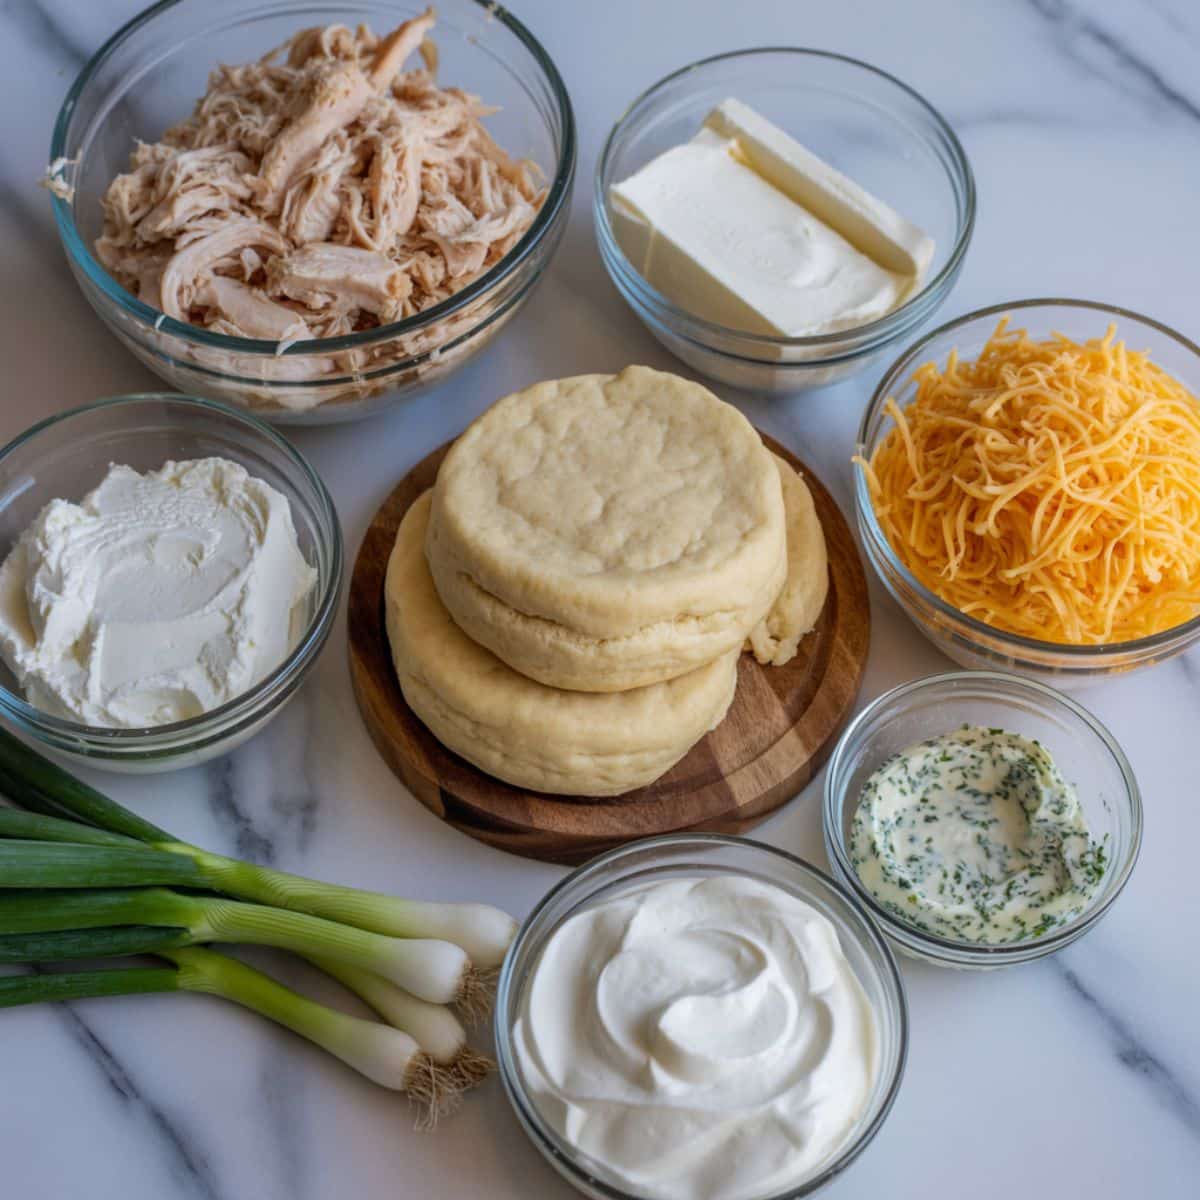
Ingredients
For the Chicken Filling:
- Cooked chicken breast (rotisserie chicken works perfectly here and saves time)
- Cream cheese, softened (this creates that irresistible creamy texture)
- Shredded cheddar cheese (sharp cheddar adds more flavor; swap for mozzarella if you prefer milder taste)
- Sour cream (Greek yogurt works as a healthier substitute)
- Ranch seasoning (or make your own with dried dill, garlic powder, and onion powder)
- Green onions, chopped (adds freshness and color)
- Garlic powder
- Salt and pepper to taste
For the Cups:
- Refrigerated biscuit dough (crescent roll dough or puff pastry sheets also work beautifully)
- Cooking spray (prevents sticking and ensures easy removal)
Optional Add-ins:
- Diced bell peppers for extra vegetables
- Bacon, cooked and crumbled
- Steamed broccoli florets, chopped small
- Buffalo sauce for a spicy kick
See recipe card for quantities.
Instructions
Prepare Your Chicken Filling
- Start by shredding your cooked chicken into bite-sized pieces. If you're using rotisserie chicken, remove the skin first for a cleaner texture.
- In a medium mixing bowl, combine the softened cream cheese and sour cream. Mix until smooth and creamy with no lumps remaining.
- Add your shredded chicken, cheddar cheese, ranch seasoning, garlic powder, green onions, and a pinch of salt and pepper.
- Stir everything together until the chicken is completely coated in the creamy mixture. Taste and adjust seasoning if needed; this filling should be well-seasoned since it's the star of your chicken cups.
- Set the filling aside while you prepare your muffin tin. This mixture can be made a day ahead and stored in the refrigerator, making this Chicken Cups Recipe even more convenient.
Form the Biscuit Cups
- Preheat your oven to 375°F and generously spray a standard 12-cup muffin tin with cooking spray.
- Open your can of biscuit dough and separate the individual biscuits.
- Flatten each biscuit with your hands or a rolling pin until it's about twice its original size and thin enough to line the muffin cups.
- Press each flattened biscuit into a muffin cup, making sure to press it up the sides to create a cup shape. The dough should come up to the rim of each muffin cup.
- Don't worry if they're not perfectly uniform; these rustic cups have charm, and the filling will cover any imperfections.
Fill and Bake
- Spoon the chicken filling into each biscuit cup, filling them about three-quarters full. Don't overfill, or the mixture might spill over during baking.
- For an extra touch, sprinkle a little additional shredded cheese on top of each cup before baking.
- Place the muffin tin in your preheated oven and bake for 18-22 minutes, until the biscuit edges are golden brown and cooked through.
- Watch them during the last few minutes of baking; ovens vary, and you want golden perfection, not burnt edges.
Cool and Serve
- Garnish with extra chopped green onions, a dollop of sour cream, or a drizzle of ranch dressing if desired. Serve them warm for the best taste and texture.
- Remove the muffin tin from the oven and let the chicken cups cool for about 5 minutes. This cooling time allows them to set and makes removal much easier.
- Run a butter knife around the edges of each cup to loosen them from the tin.
- Carefully lift each cup out and place them on a serving platter.
Expert Cooking Tips
- Choose Your Chicken Wisely Rotisserie chicken is your best friend for this recipe. It's already seasoned, juicy, and saves you at least 30 minutes of cooking time. If you're using raw chicken breast, poach it in chicken broth with some herbs for maximum flavor, then let it cool before shredding.
- Don't Skip Softening the Cream Cheese Cold cream cheese creates lumps that won't mix properly. Let it sit at room temperature for about 30 minutes before starting, or microwave it for 15-20 seconds to soften it quickly. Smooth filling makes better chicken cups.
- Prevent Soggy Bottoms Make sure your chicken filling isn't too wet. If you've added vegetables like tomatoes or using particularly juicy chicken, pat everything dry with paper towels first. Excess moisture leads to soggy biscuit bottoms that nobody wants.
- Customize Your Dough While biscuit dough is classic, experimenting with different bases changes the entire character of your chicken cups. Crescent roll dough creates flakier, buttery cups. Puff pastry makes them more elegant and party-worthy. Even phyllo dough works for a lighter, crispier version.
- Avoid Overfilling It's tempting to pack in as much filling as possible, but restraint pays off here. Overfilled cups can overflow during baking, making a mess and potentially burning on the bottom of your oven. Fill to about three-quarters full for perfect results.
- Check for Doneness The biscuit edges should be golden brown, but also check that the bottom of each cup is cooked through. If the tops are browning too quickly before the bottoms are done, tent the muffin tin loosely with aluminum foil for the last few minutes of baking.
Recipe Variations & Substitutions
Make It Buffalo Style
- Transform these into buffalo chicken cups by mixing 3 tablespoons of buffalo sauce into your filling and reducing the ranch seasoning slightly. Top with crumbled blue cheese and serve with extra buffalo sauce and celery sticks on the side. These are perfect for game day parties.
Add More Vegetables
- Sneak in extra nutrition by folding steamed broccoli, diced bell peppers, or corn into your filling. Chop vegetables small so they distribute evenly and don't create large chunks that might break the biscuit cups. This variation works great for picky eaters who won't notice the extra veggies.
Bacon Lover's Version
- Everything is better with bacon, right? Cook 4-5 strips until crispy, crumble them, and mix into your chicken filling. The smoky, salty flavor pairs incredibly well with the creamy base. You can also use real bacon bits in a pinch, though fresh-cooked bacon tastes significantly better.
Mexican-Inspired Chicken Cups
- Swap the ranch seasoning for taco seasoning, use Monterey Jack cheese instead of cheddar, and add a tablespoon of salsa to your filling. Top with jalapeño slices before baking and serve with guacamole and sour cream. These chicken taco cups are fantastic for Cinco de Mayo or any Mexican food night.
Dietary Modifications
- For a lower-carb version, skip the biscuit dough entirely and use bell pepper halves or portobello mushroom caps as your vessels. For gluten-free, use gluten-free biscuit dough or make cups from gluten-free puff pastry. Make them dairy-free by substituting dairy-free cream cheese and omitting the cheese, though they won't be quite as creamy.
Fancy Alfredo Cups
- Replace the ranch seasoning with Italian seasoning, swap sour cream for Alfredo sauce, and use mozzarella and Parmesan instead of cheddar. Add some spinach for color and nutrients. These taste like chicken Alfredo in portable form.
Equipment Recommendations
- Standard 12-cup muffin tin (non-stick makes removal easier, but any muffin tin works with proper greasing)
- Mixing bowls (one medium bowl is sufficient for combining all filling ingredients)
- Measuring cups and spoons (for accurate ingredient proportions)
- Wooden spoon or spatula (for mixing the filling thoroughly)
- Rolling pin (optional, but helpful for flattening biscuit dough evenly)
- Cooking spray (prevents sticking better than butter alone)
- Butter knife (for loosening finished chicken cups from the muffin tin)
- Wire cooling rack (allows air circulation so bottoms don't get soggy)
You don't need any fancy equipment for this Chicken Cups Recipe. Everything listed is standard kitchen gear that most people already own. If you don't have a rolling pin, use a wine bottle or even your hands to flatten the biscuit dough.
Storage & Meal Prep Tips
Refrigerator Storage
- Store leftover chicken cups in an airtight container in the refrigerator for up to 4 days. Let them cool completely before storing to prevent condensation, which makes them soggy. Reheat in a 350°F oven for 8-10 minutes or microwave for 45-60 seconds until warmed through.
Freezing Instructions
- These chicken cups freeze beautifully, making them perfect for meal prep. After baking and cooling completely, wrap each cup individually in plastic wrap, then place them all in a freezer-safe bag. They'll keep for up to 3 months. Reheat from frozen in a 350°F oven for 15-18 minutes, or thaw overnight in the refrigerator and reheat as usual.
Make-Ahead Strategy
- You can prepare the filling up to 2 days in advance and store it covered in the refrigerator. When you're ready to bake, simply assemble the cups and pop them in the oven. This makes entertaining much less stressful. Alternatively, assemble unbaked cups in the muffin tin, cover tightly with plastic wrap, and refrigerate for up to 24 hours before baking.
Reheating for Best Results
- While microwaving is quickest, oven reheating produces superior results. The biscuit exterior regains some crispness in the oven, whereas microwaving can make it slightly chewy. If you're reheating several at once for a party, arrange them on a baking sheet and warm at 350°F until heated through.
The One Trick That Makes These Irresistible
Here's something most recipes won't tell you about making the perfect Chicken Cups Recipe; let your filling rest in the refrigerator for at least 30 minutes before assembling. This simple step allows all the flavors to marry together, creating a more cohesive and delicious filling. The cold filling is also easier to scoop and stays put better when you're filling the biscuit cups, preventing that annoying overflow situation.
Another secret I learned from my grandmother is adding a tiny pinch of smoked paprika to the filling. You won't taste it distinctly, but it adds a subtle depth and warmth that makes people ask, "What's in these?" That mysterious something-special factor elevates your Chicken Cups Recipe from good to absolutely crave-worthy. Trust me, this one small addition has earned me more compliments than any other modification I've tried.
FAQ
What are chicken cups?
Chicken cups are bite-sized appetizers or snacks made by filling pastry or biscuit dough cups with a creamy, seasoned chicken mixture and baking until golden. They're essentially individual portions of chicken filling in edible, handheld containers. This Chicken Cups Recipe creates the perfect combination of crispy exterior and creamy, savory filling that works for parties, dinners, or snacks.
How high off the ground should chicken water cups be?
This question relates to raising backyard chickens, not the recipe! For poultry waterers, cups should be positioned at the height of the chicken's back; typically 6-8 inches off the ground for adult chickens. This prevents contamination and makes drinking comfortable for your flock.
Why is crack chicken called crack?
Crack chicken gets its name because it's supposedly so addictively delicious that people can't stop eating it, similar to these chicken cups. The term isn't related to actual drugs but refers to the combination of ranch seasoning, cream cheese, cheese, and bacon that creates an irresistibly savory flavor profile. Many chicken cup variations use similar ingredients.
Are chicken lettuce wraps healthy?
Chicken lettuce wraps can be quite healthy since lettuce is low in calories and chicken provides lean protein. However, the healthiness depends on the filling and sauce. Our Chicken Cups Recipe is more indulgent due to cream cheese and biscuit dough, but you can make lighter modifications by using Greek yogurt instead of sour cream and serving the filling in lettuce cups instead of pastry for a low-carb alternative.
Bring Comfort Food to Your Table Tonight
These golden, crispy chicken cups prove that impressive food doesn't require complicated techniques or expensive ingredients. Every time I pull a batch from the oven, I'm reminded why this Chicken Cups Recipe has become such a staple in my kitchen. They're foolproof enough for beginners but delicious enough to serve at your fanciest gatherings. The combination of flaky biscuit, creamy filling, and melted cheese creates pure comfort in every bite.
Whether you're feeding hungry kids after school, bringing something to share at the office, or just want a satisfying dinner that comes together quickly, these chicken cups deliver. Make them once, and I guarantee they'll become part of your regular rotation too. Looking for more crowd-pleasing comfort food? Try pairing these with our Truffle Mashed Potatoes Recipe for an upscale dinner party, or serve alongside our Loaded Mashed Potato Meatloaf Casserole Recipe for the ultimate comfort food spread. Now grab that muffin tin and let's get cooking; your family is going to love this Chicken Cups Recipe!
With love from my kitchen to yours
By Lisa Johnson 🥰
Related
Looking for other recipes like this? Try these:
Pairing
These are my favorite dishes to serve with Chicken Cups Recipe

Chicken Cups Recipe
Equipment
- 1 Standard 12-cup muffin tin Non-stick preferred
- 1 Mixing bowl Medium size for filling
- 1 Measuring cups & spoons set For accurate proportions
- 1 Wooden spoon or spatula For mixing filling
- 1 Rolling Pin Optional – flatten dough
- 1 Cooking spray To grease muffin tin
- 1 Butter knife To loosen baked cups
- 1 Wire cooling rack Prevents soggy bottoms
Ingredients
- 2 cups cooked chicken breast Shredded; rotisserie works great
- 4 oz cream cheese Softened
- ½ cup shredded cheddar cheese Sharp cheddar for best flavor
- ¼ cup sour cream Greek yogurt can substitute
- 2 tablespoon ranch seasoning Store-bought or homemade
- 2 green onions Chopped
- ¼ teaspoon garlic powder —
- salt & pepper To taste
- 1 can refrigerated biscuit dough 8-count; or use crescent dough
- cooking spray For greasing tin
- 3 strips bacon optional; cooked & crumbled
- ½ cup steamed broccoli florets optional; chopped small
- 2 tablespoon buffalo sauce optional; for spicy version
- ¼ cup diced bell peppers optional; adds color & crunch
Instructions
- Preheat oven to 375°F and grease muffin tin with cooking spray.
- Combine cream cheese and sour cream until smooth, then add chicken, cheese, ranch seasoning, green onions, and spices.
- Flatten biscuits and press into muffin tin to form cups.
- Spoon filling into each cup about three-quarters full.
- Bake 18–22 minutes until golden brown and cooked through.
- Let cool 5 minutes, loosen edges with a knife, and serve warm.
Notes
- Nutrition information is automatically calculated, so should only be used as an approximation.

Leave a Reply